简介
持续集成
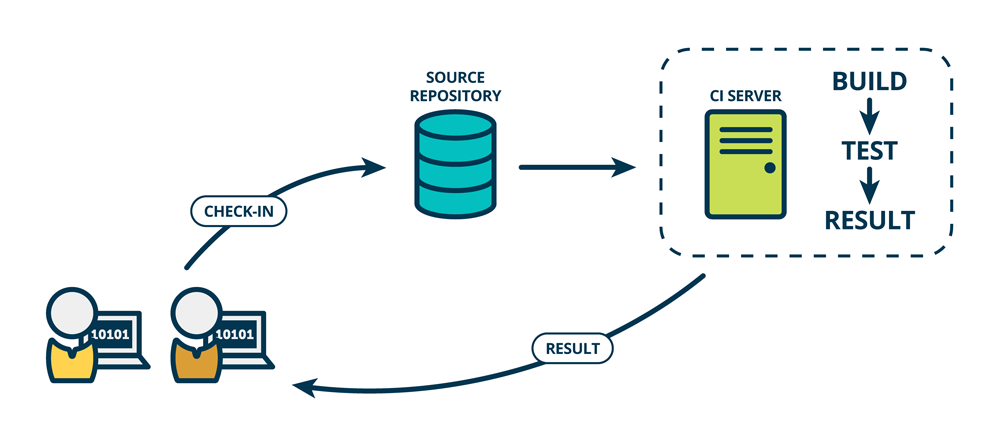
持续集成(Continuous Integration)是指在软件开发过程中,频繁地将代码集成到主干上,然后进行自动化测试。
持续交付
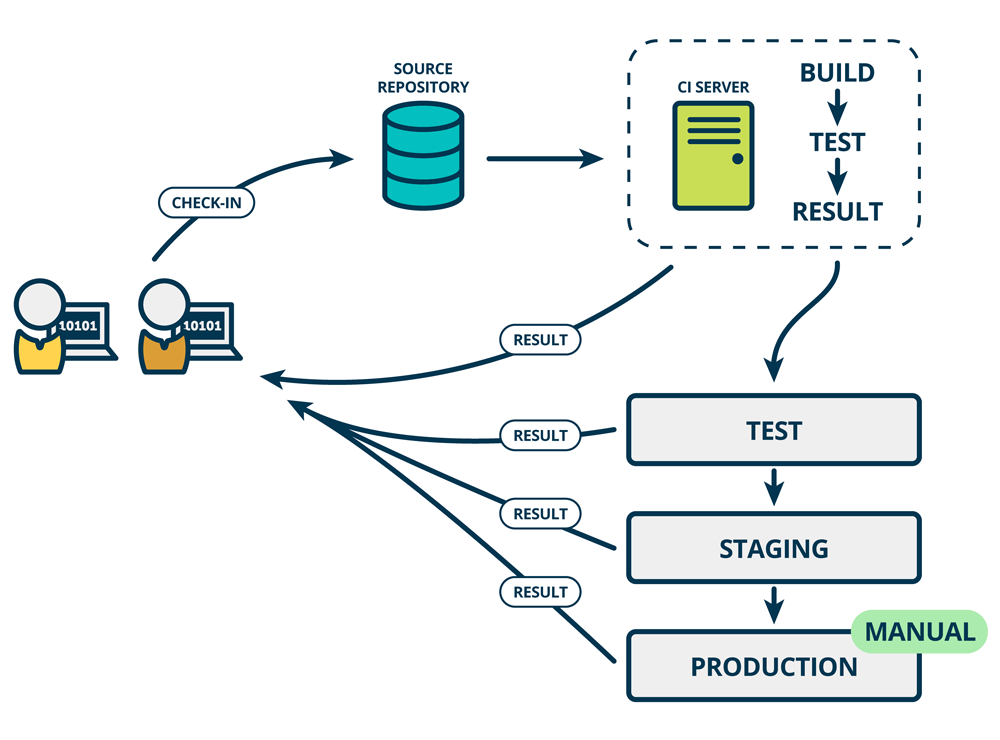
持续交付(Continuous Delivery)是指在持续集成的基础上,将集成后的代码部署到更贴近真实运行环境的“类生产环境”(production-like environments)中。 比如,我们完成单元测试后,可以把代码部署到连接数据库的 Staging 环境中进行更多的测试。如果代码没有问题,可以继续手动部署到生产环境中。
持续部署
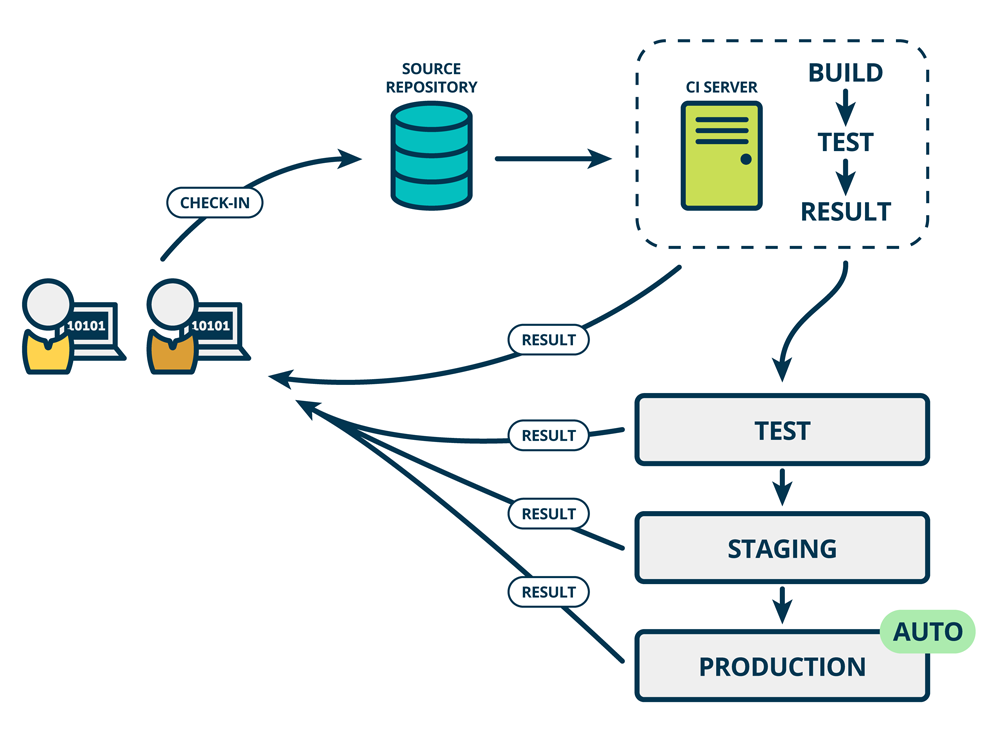
持续部署(Continuous Deploy)是在持续交付的基础上,把部署到生产环境的过程自动化。持续部署和持续交付的区别就是最终部署到生产环境是自动化的。
GitLab是一个代码仓库,用来管理代码。Jenkins是一个自动化服务器,可以运行各种自动化构建、测试或部署任务。所以这两者结合起来,就可以实现开发者提交代码到GitLab,Jenkins以一定频率自动运行测试、构建和部署的任务,帮组开发团队更高效的集成和发布代码。
注意这只是测试环境,而生产环境依然需要手动部署代码。
环境
1 | CentOS 7 |
Gitlab安装配置
https://about.gitlab.com/installation/#centos-7
安装并配置必要的依赖项
1 | sudo yum install -y curl policycoreutils-python openssh-server git |
接下来,安装Postfix以发送通知电子邮件。如果要使用其他解决方案发送电子邮件,请跳过此步骤并在安装GitLab后配置外部SMTP服务器。1
2
3sudo yum install postfix
sudo systemctl enable postfix
sudo systemctl start postfix
在Postfix安装期间,可能会出现配置屏幕。选择“Internet Site”并按Enter键。使用服务器的外部DNS作为“邮件名称”,然后按Enter键。如果出现其他屏幕,请继续按Enter键接受默认值
添加GitLab软件包存储库并安装软件包
1 | curl https://packages.gitlab.com/install/repositories/gitlab/gitlab-ee/script.rpm.sh | sudo bash |
由于网络问题,建议使用清华大学镜像源1
2
3
4
5
6
7
8
9
10
11
12cat << EOF > /etc/yum.repos.d/gitlab-ce.repo
[gitlab-ce]
name=gitlab-ce
baseurl=http://mirrors.tuna.tsinghua.edu.cn/gitlab-ce/yum/el7
repo_gpgcheck=0
gpgcheck=0
enabled=1
gpgkey=https://packages.gitlab.com/gpg.key
EOF
yum makecache
yum install -y gitlab-ce
更改为访问GitLab URL1
2
3
4
5
6cp /etc/gitlab/gitlab.rb{,.bak}
sed -i 's#^external_url 'http://gitlab.example.com'#external_url 'http://gitlab.sundayle.com'#' /etc/gitlab/gitlab.rb
gitlab-ctl reconfigure
gitlab-ctl restart
gitlab-ctl status
访问 gitlab.sundayle.com
注:重启需要一分钟才能正常访问,立即访问显示502。
Jenkins安装配置
1 | wget -O /etc/yum.repos.d/jenkins.repo http://pkg.jenkins.io/redhat/jenkins.repo |
注:若jenkins和gitlab在同一台服务器需要修改jenkins端口,将8080修改为80811
2sed -i 's#JENKINS_PORT="8080"#JENKINS_PORT="8081"#g' /etc/sysconfig/jenkins
systemctl start jenkins
访问http://gitlab.sundayle.com:8081/
gitlab自动触发构建jenkins
安装插件:GitLab Plugins
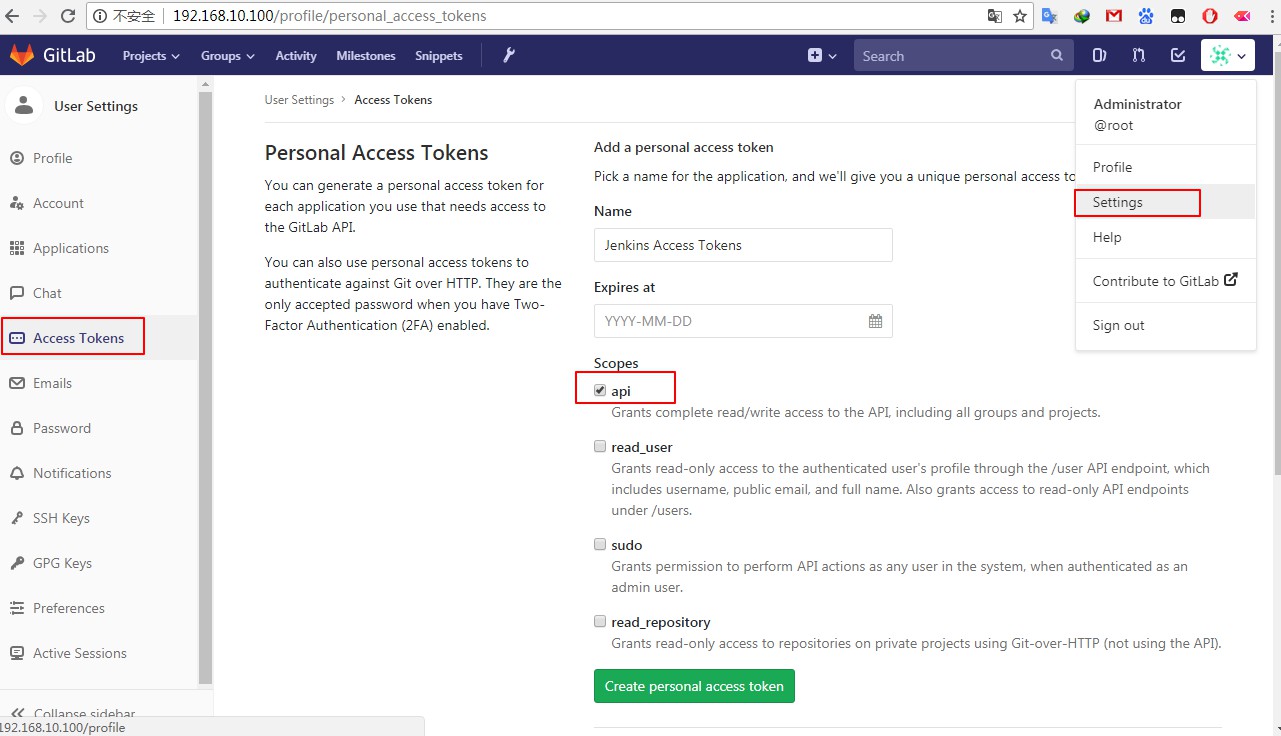
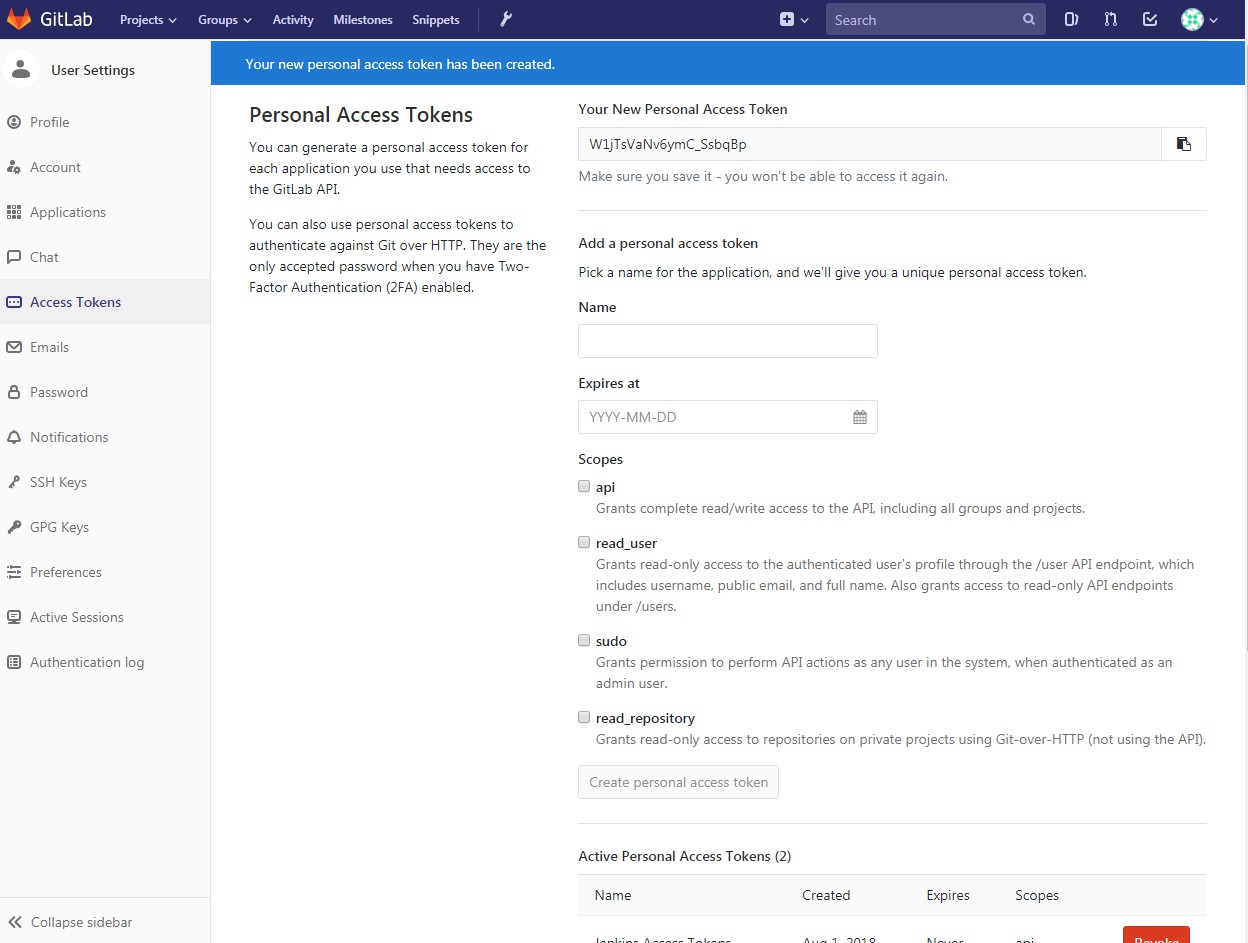
gitlab 添加Access Tokens
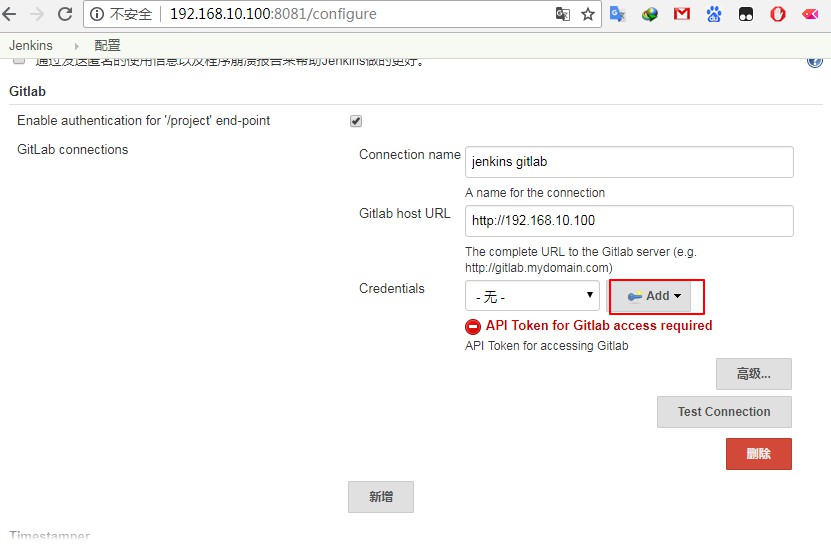
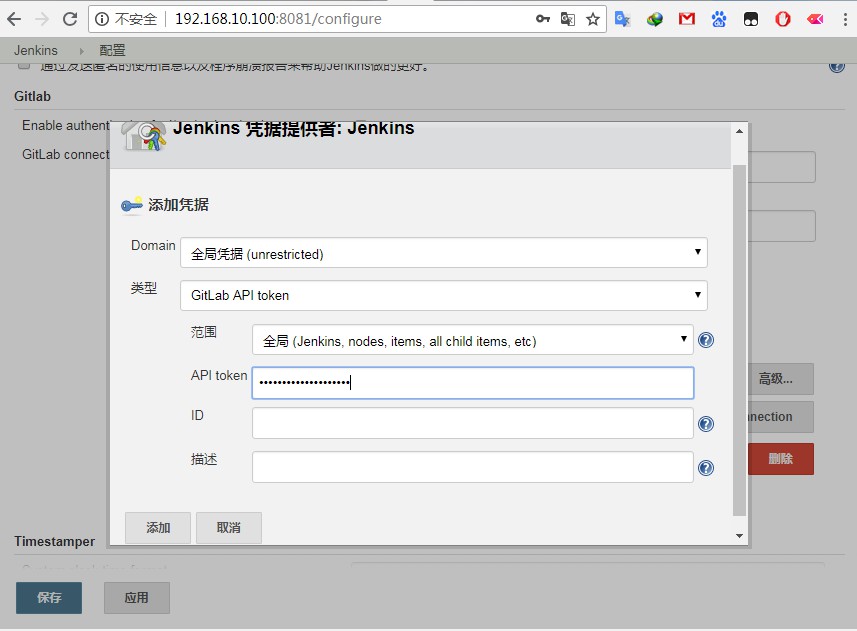
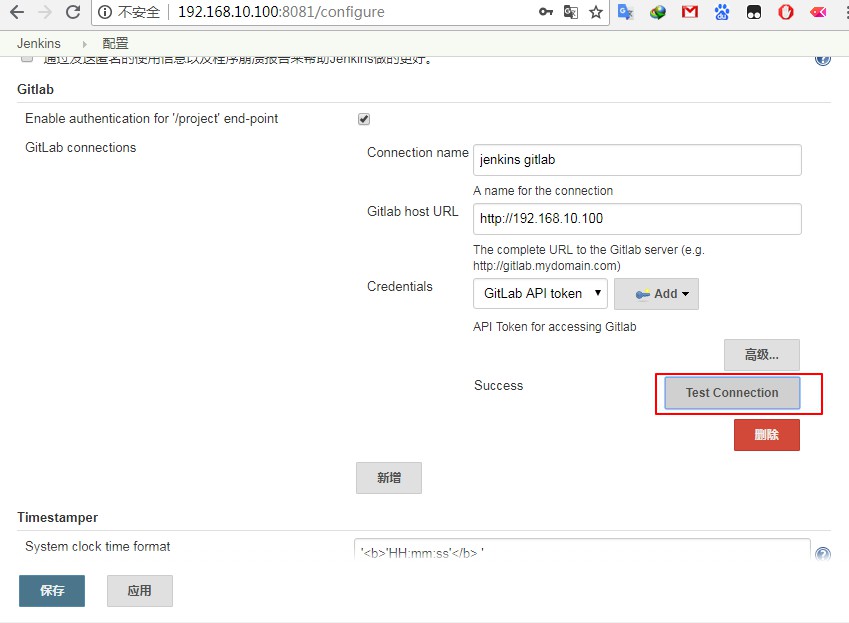
Jenkin 系统管理 gitlab配置api并测试
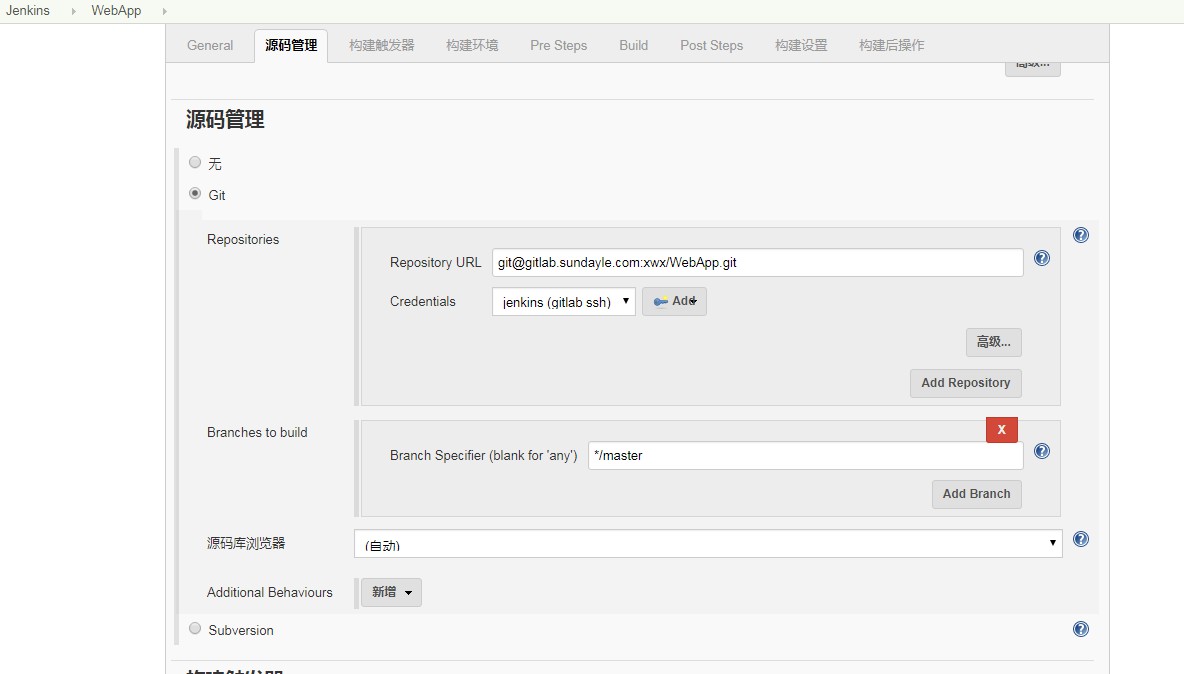
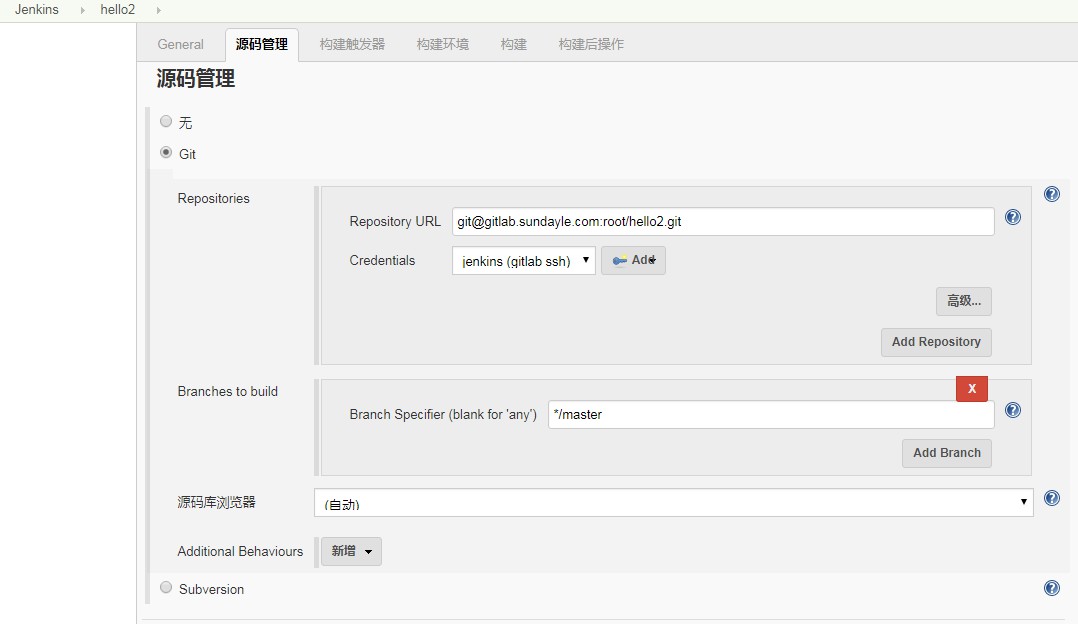
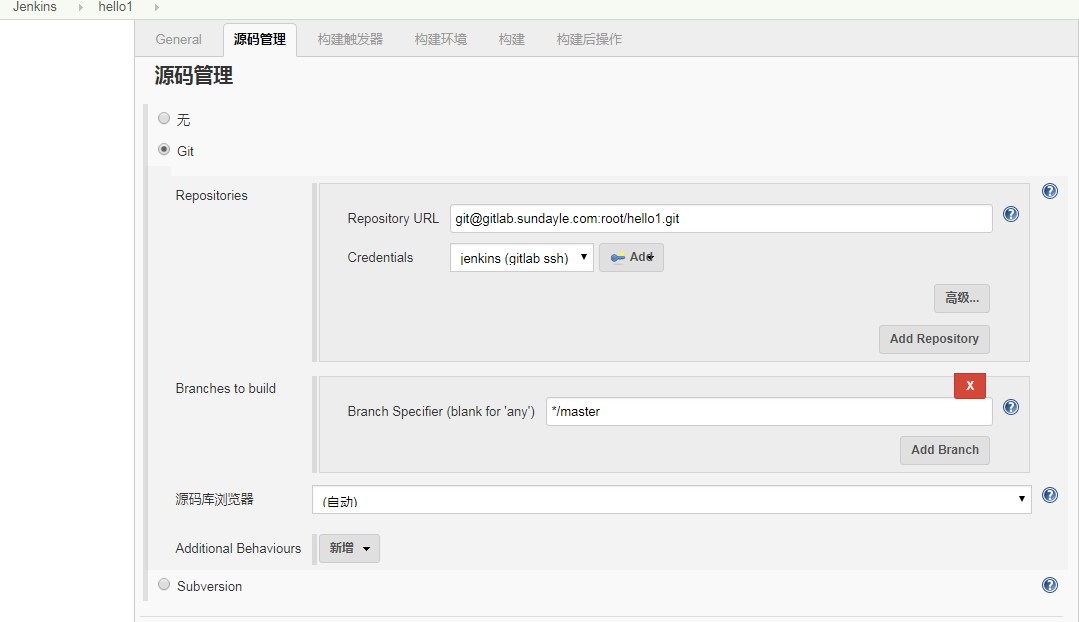
新建任务 WebApp项目 源码配置
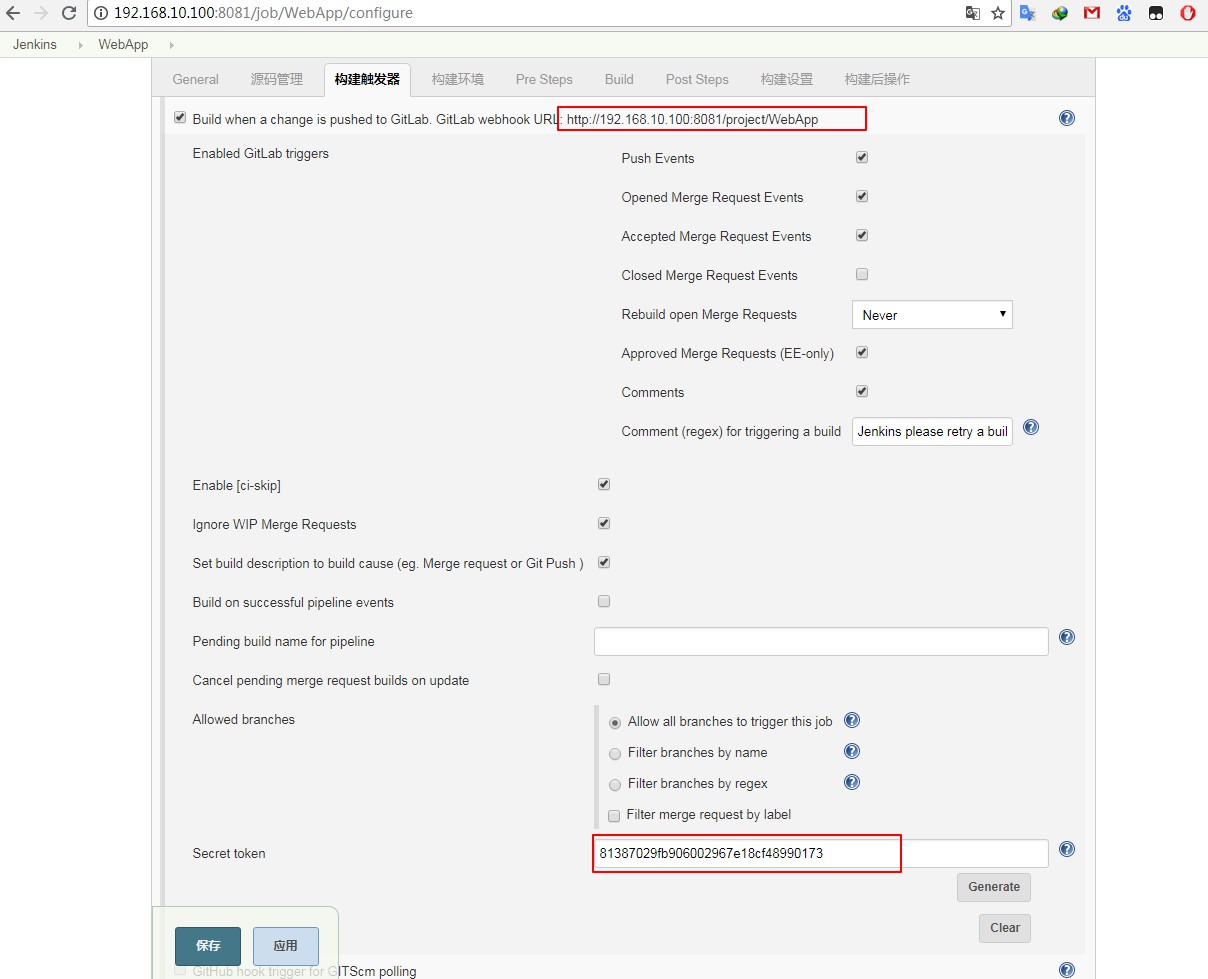
WebApp项目 gitlab hook配置
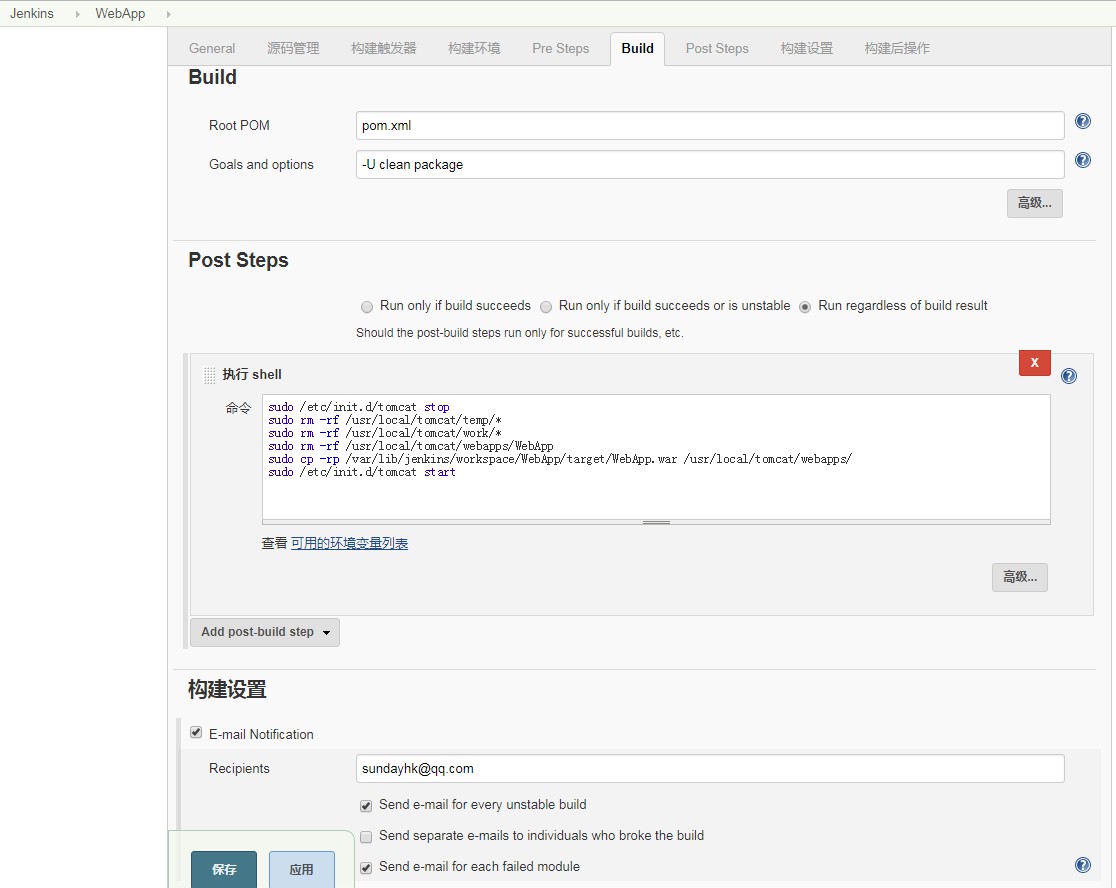
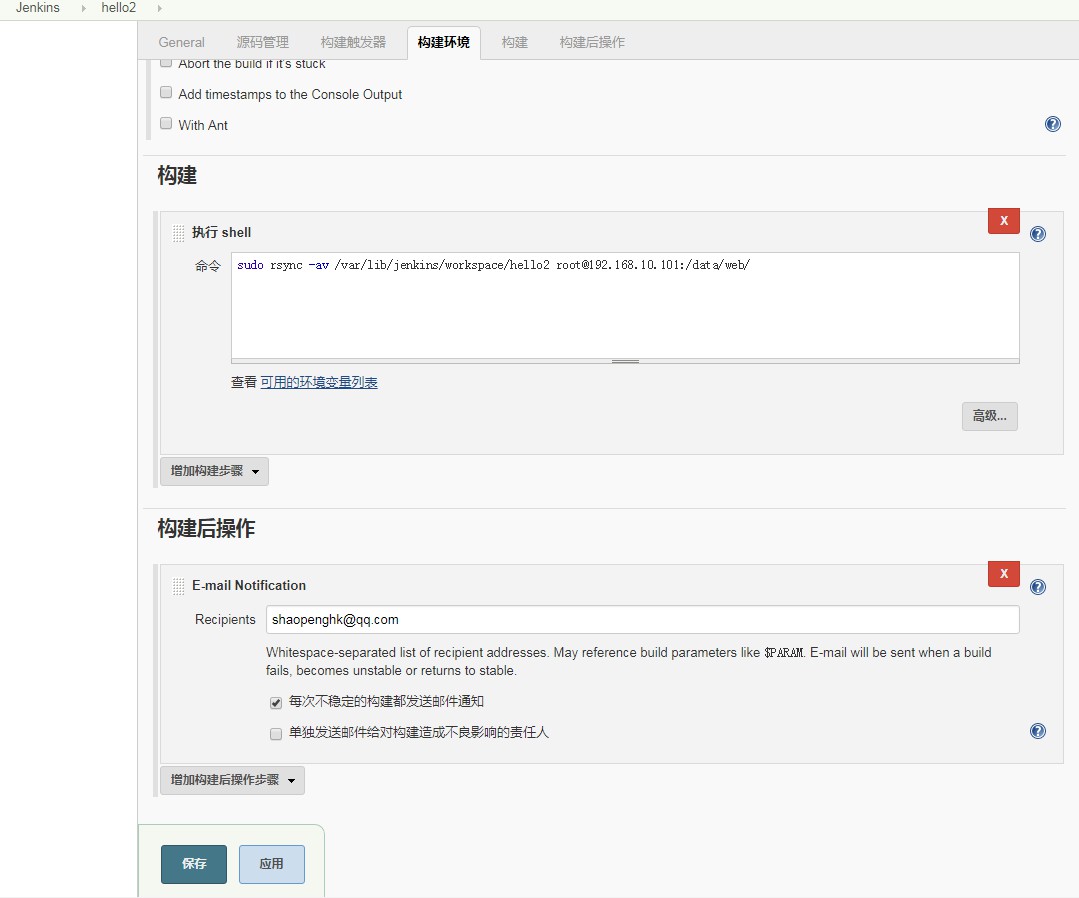
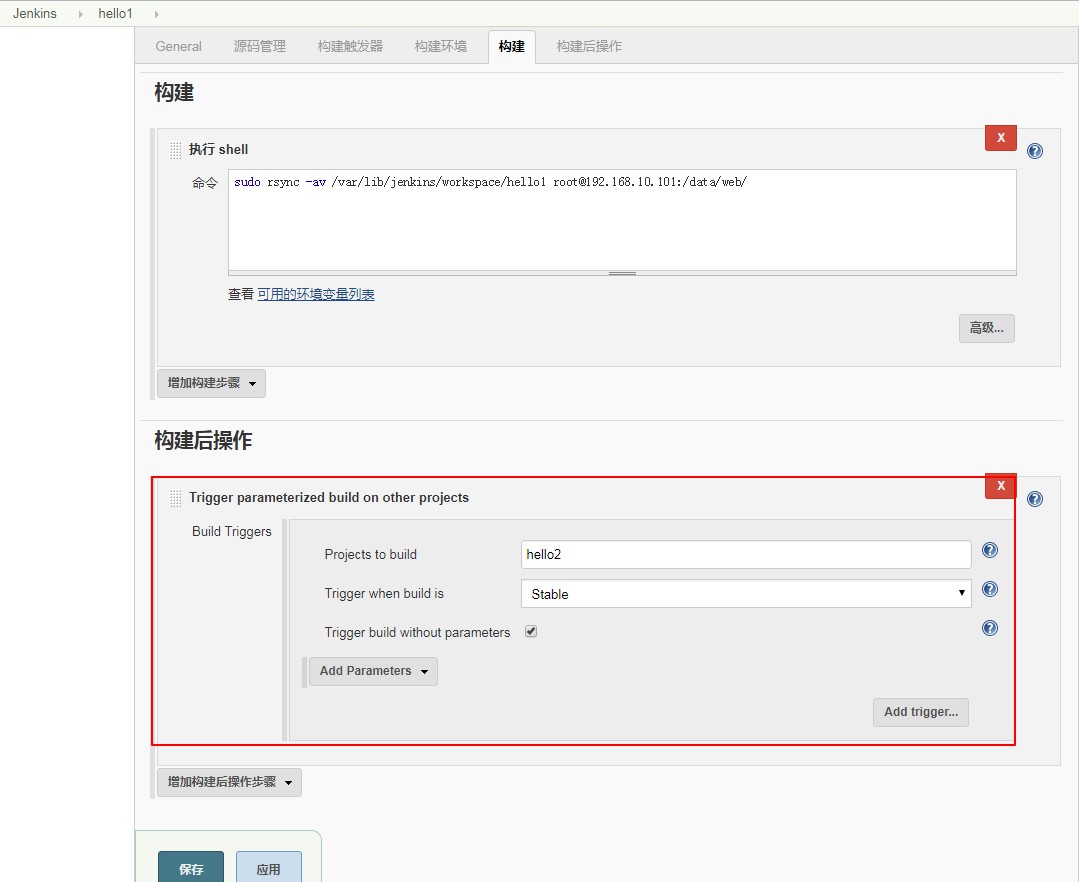
WebApp项目 配置Build、Post Steps
gitlab 配置Webhook
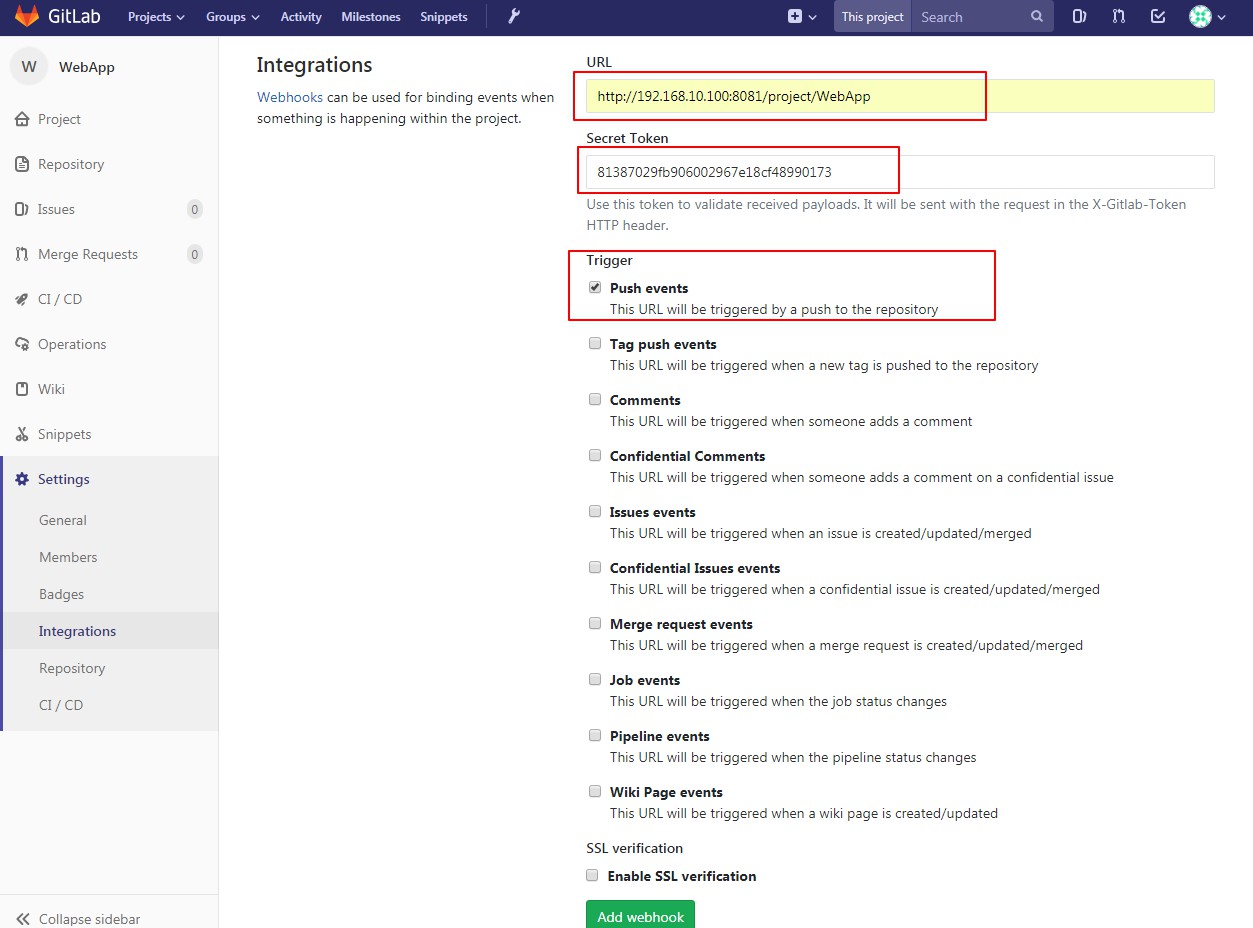
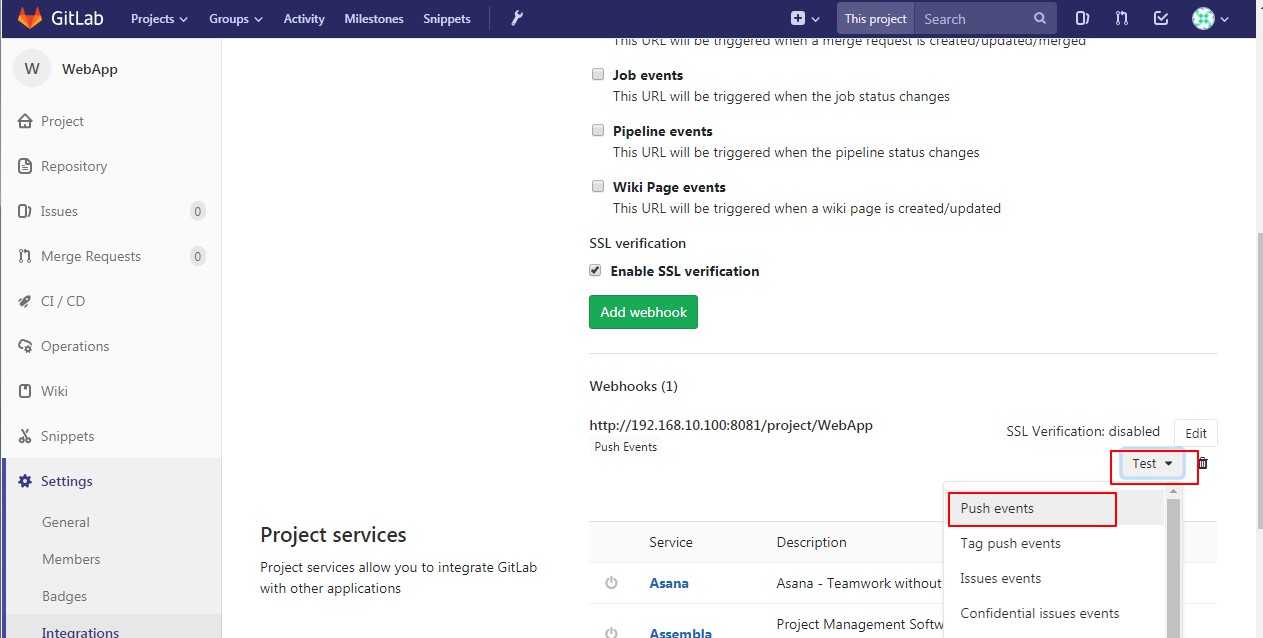

gitlab 添加webhook 报错 Url is blocked: Requests to localhost are not allowed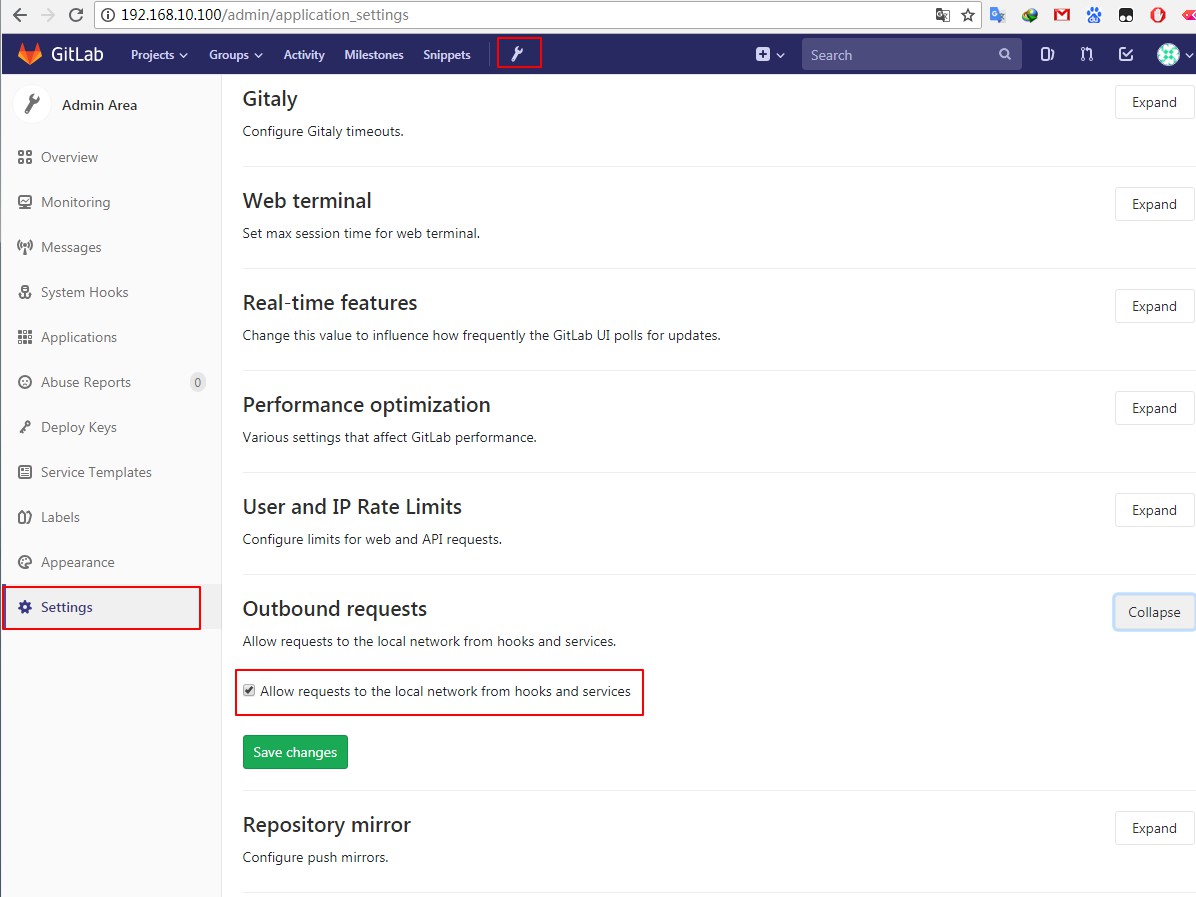
流水线
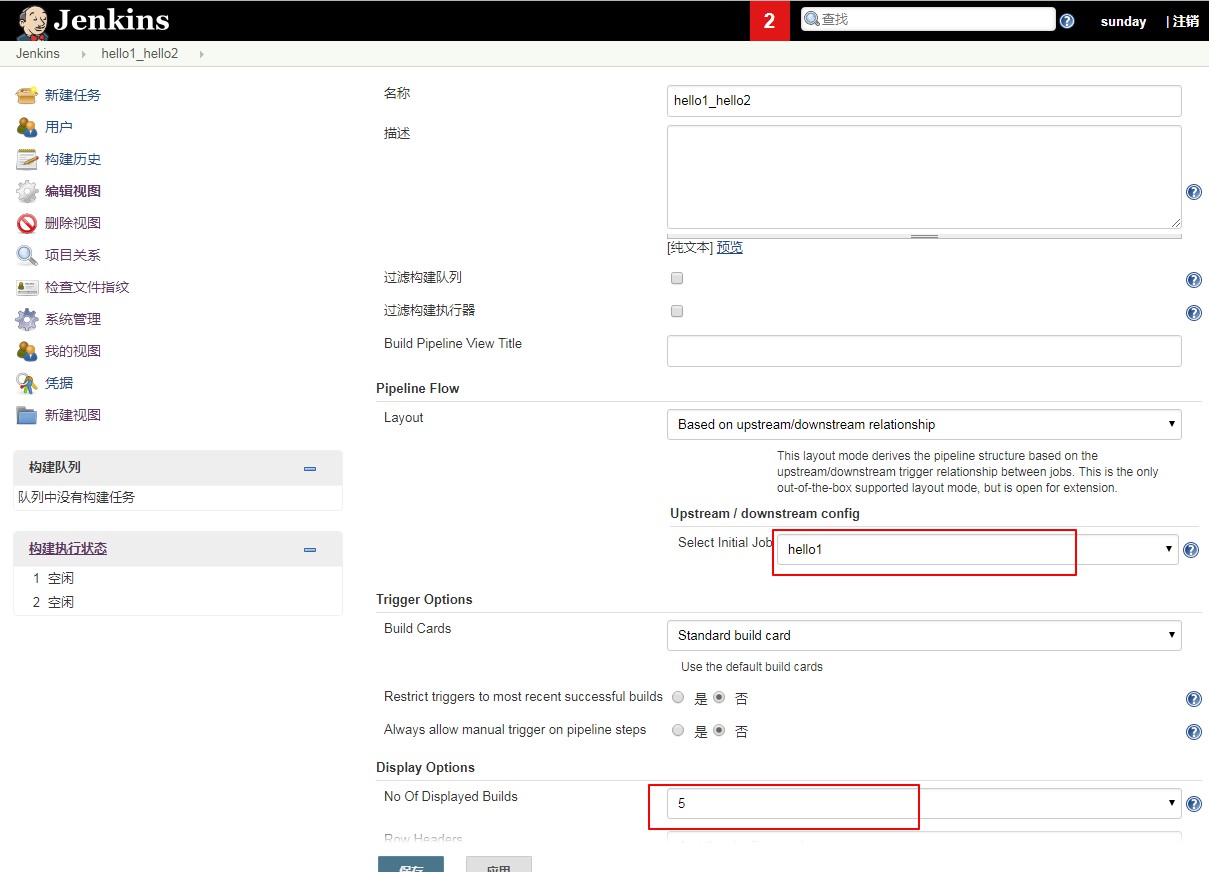
安装插件: Build Pipeline Plugin 进行图形化操作
部署两个项目代码至node2服务器
node1操作
1 | visudo |
1 | ssh-keygen |
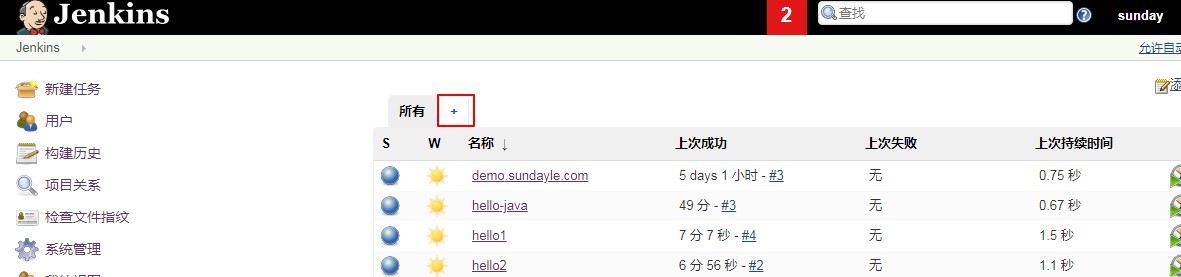
Jenkins 新建任务 hello2
Jenkins 新建任务 hello1
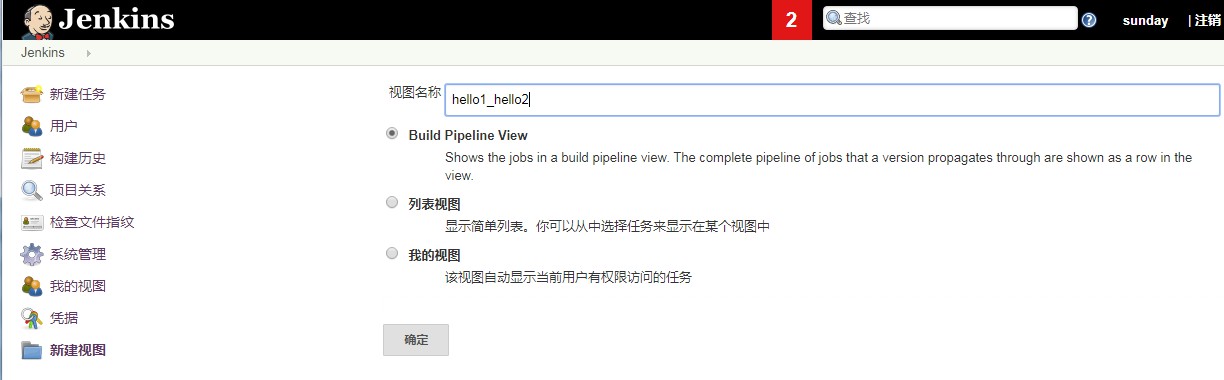
Jenkins 新建pipeline 视图
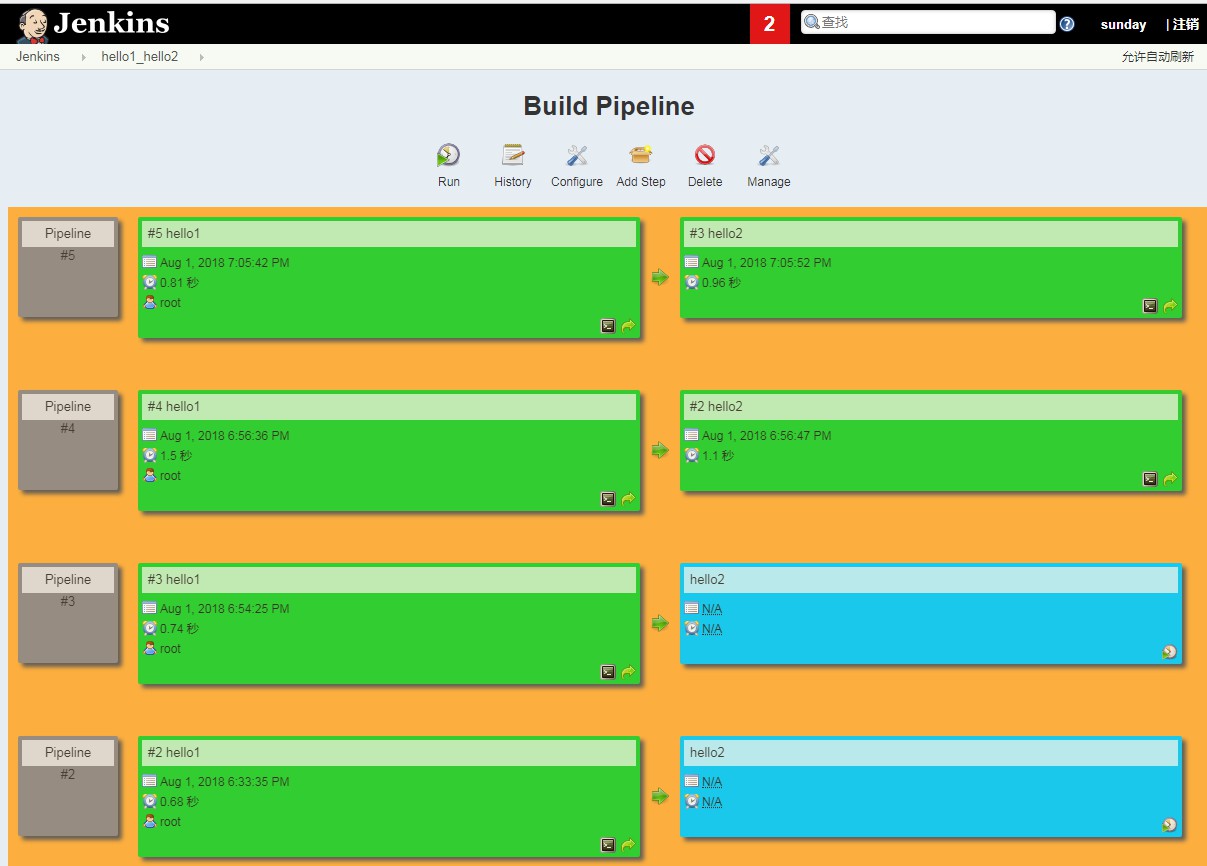
node2效果
1 | tree /data/web/ |